1. Before You Get Started
1.1. What is Connext DDS?

RTI® Connext® DDS is a connectivity framework for building distributed applications with requirements for high performance and scalability. It includes these components:
An SDK that provides you with APIs to help you send and receive data using the communication patterns described in this documentation (see Next Steps). These APIs allow you to connect your own applications to other applications on the databus.
Tools that help you visualize your data and debug your distributed system.
Infrastructure Services that can perform dedicated functions in your system, such as recording, bridging, and persisting data.
1.2. Downloading Connext DDS
If you haven’t already purchased a Connext bundle, you can follow this Getting Started guide with an evaluation bundle. To obtain an evaluation bundle, click the Free Trial button at https://www.rti.com/. Fill out the brief form, and you will receive an evaluation package shortly.
1.3. Installing Connext DDS
To develop Python applications, you will need the following Connext bundles:
A host bundle that contains files such as documentation, the code generator, other tools, and infrastructure services executables. The host bundle is provided in a .run or .exe file that will run an installer.
Host bundles are named:
rti_connext_dds-<version>-<package_type>-host-<host-platform>.runrti_connext_dds-<version>-<package_type>-host-<host-platform>.dmgrti_connext_dds-<version>-<package_type>-host-<host-platform>.exeThe
<package_type>is usuallypro.The
<host_platform>depends on your development platform, such asx64Win64for a 64-bit Windows® platform.
A target bundle that contains SDK libraries you will use to build the Python API for your platform. The target bundle is only required to build the Python API (next step), not to run your Python applications afterward.
A target bundle is an “RTI Package” (*.rtipkg) file that must be installed on top of your host bundle. After you install the host bundle, you will have a script called
bin/rtipkginstall[.bat]. You can use this script to install one or more target bundles. Or you can use RTI Launcher to install the target bundles. (Launcher is installed as part of the host bundle.) See Installing additional packages with a GUI.Target bundles are named:
rti_connext_dds-<version>-<package_type>-target-<architecture>.rtipkg. The<architecture>depends on your target machine (where you will deploy your completed application). Yourarchitectureis the combination of a processor, OS, and compiler version that you will use to build your application. For example, if you have a 64-bit Windows machine with Visual Studio® 2017, usex64Win64VS2017. For a 64-bit Linux machine with gcc version 5.4.0, usex64Linux3gcc5.4.0. To see the full list of available architectures, see the “RTI Architecture Abbreviation” columns in the RTI Connext DDS Core Libraries Platform Notes.
The Python API, which in this release is distributed as buildable source. See Building and Installing.
Once you have built and installed the Python API, you can import it on any Python application on your machine.
Note
In the future, the Python API will be available via
pip, so the steps to install the target and build the API won’t be necessary.
1.3.1. Installing a Host
The host bundle is an application; thus, it can be started from a GUI or command line. To install the host bundle, do either of the following:
Double-click the installer.
Run the installation script from a command prompt. See Installing RTI Connext DDS, in the RTI Connext DDS Installation Guide.
1.3.2. Installing additional packages with a GUI
After you install the host bundle, you’ll have a tool called RTI Launcher. (See Starting Launcher, in the RTI Launcher User’s Manual.)
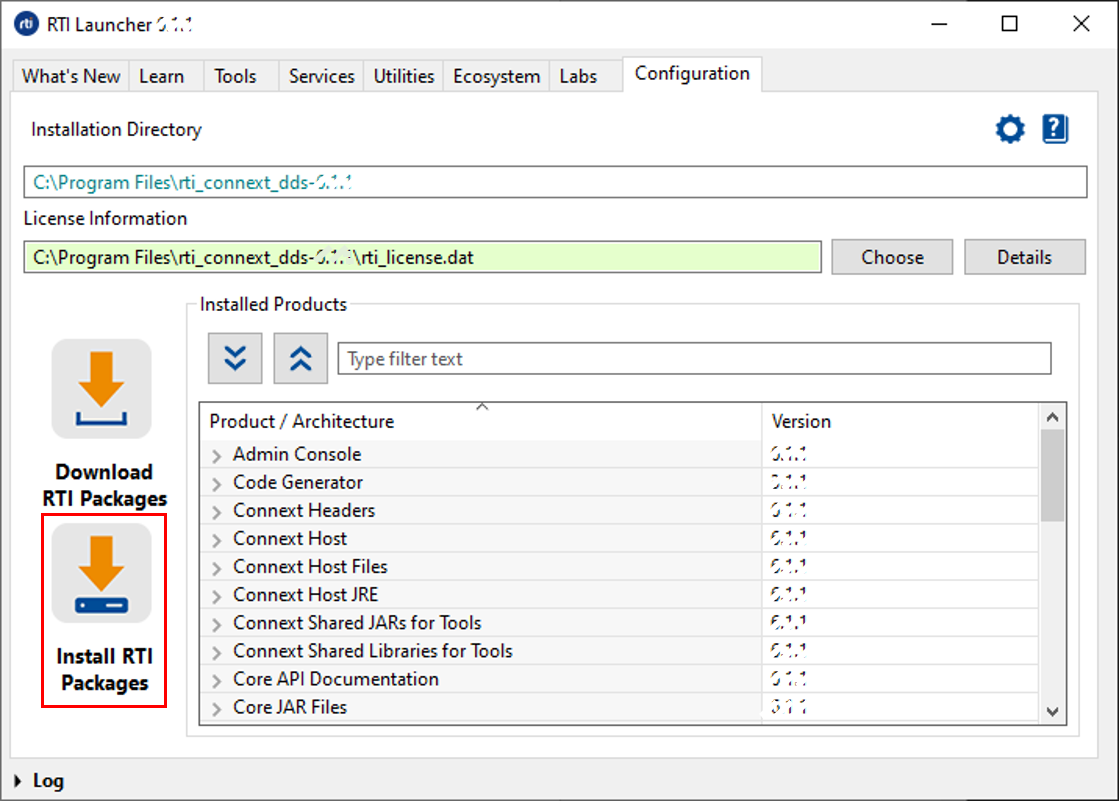
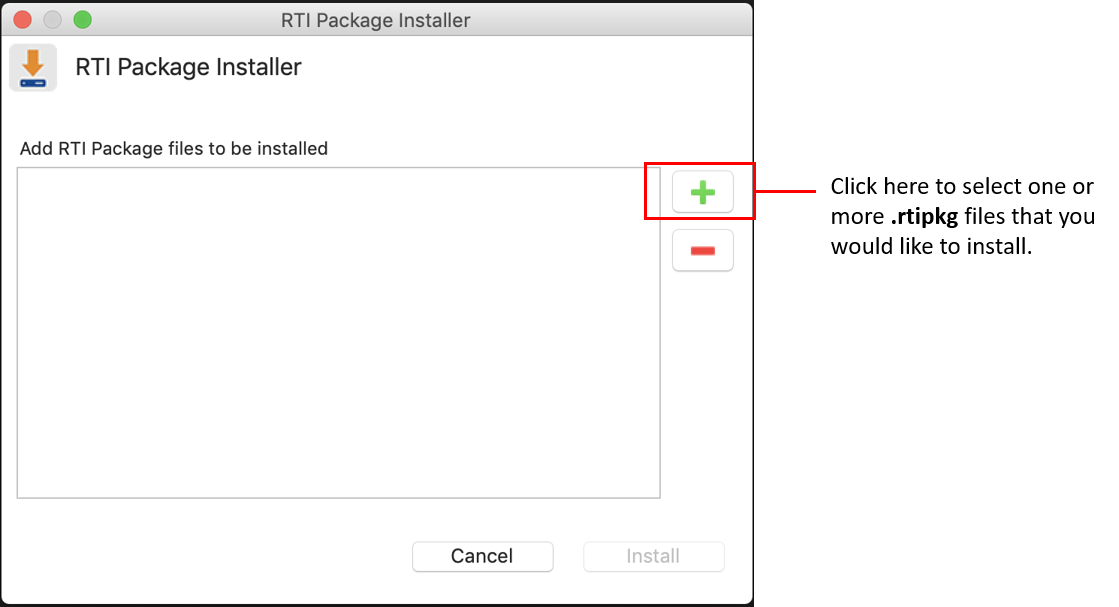
To install additional packages from the Launcher tool, open the Configuration tab, and select “Install RTI Packages.” This will open a dialog that allows you to select one or more .rtipkg files that you would like to install.
1.3.3. Installing additional packages from a Command Line
To install additional packages from the command line, type:
$ <installdir>/bin/rtipkginstall <path to rtipkg>
$ <installdir>/bin/rtipkginstall <path to rtipkg>
> <installdir>\bin\rtipkginstall <path to rtipkg>
1.3.4. Paths Mentioned in Documentation
This documentation refers to the following directories, depending on your operating system:
$NDDSHOME This refers to the installation directory for Connext.
The default installation paths are:
Non-root user:
/home/<your user name>/rti_connext_dds-<version>Root user:
/opt/rti_connext_dds-<version>
$NDDSHOME is an environment variable set to the installation path.
$NDDSHOME This refers to the installation directory for Connext.
The default installation path is:
/Applications/rti_connext_dds-<version>
$NDDSHOME is an environment variable set to the installation path.
%NDDSHOME% This refers to the installation directory for Connext.
The default installation paths are:
User without Administrator privileges:
<your home directory>\rti_connext_dds-<version>User with Administrator privileges:
"C:\Program Files\rti_connext_dds-<version>"
%NDDSHOME% is an environment variable set to the installation path.
Note
When using a command prompt to enter a command that includes the path
C:\Program Files (or any directory name that has a space), enclose
the path in quotation marks. For example:
“C:\Program Files\rti_connext_dds-version\bin\rtilauncher.bat”.
Or if you have defined the NDDSHOME environment variable:
"%NDDSHOME%\bin\rtilauncher.bat".
Sometimes this documentation uses <NDDSHOME> to refer to the installation path.
Whenever you see <NDDSHOME> used in a path, replace it with $NDDSHOME for Linux or
macOS systems, with %NDDSHOME% for Windows systems, or with your installation path.
1.4. Setting Up a License
Most installations require a license file to run the tools or features included in the Connext platform. If your distribution requires a license file, you will receive one from RTI via e-mail.
The easiest way to configure your license file is using Launcher, as shown below:

If you do not want to use Launcher, you can also install a license by placing it in one of these two locations:
<installation directory>/rti_license.dat<workspace directory>/rti_license.dat
The workspace directory is in this location by default, depending on your operating system:
/home/<your username>/rti_workspace/
/Users/<your username>/rti_workspace/
<your Windows documents folder>\rti_workspace\
A third way to install a license is to configure the environment
variable RTI_LICENSE_FILE to point to your license file.
If you’re using the Connext NuGet packages from nuget.org, you will also need
the license file to run your applications. You can copy the rti_license.dat file
to the location where you run your application, set the RTI_LICENSE_FILE
environment variable, or set its location in the DomainParticipantQos.
For more details on how to install a license file, see the License Management section in the RTI Connext DDS Installation Guide.
1.5. Checking What is Installed
To find out what target libraries or add-ons you have installed, you can use the Launcher tool. See Starting Launcher, in the RTI Launcher User’s Manual. Once in Launcher, open the Configuration tab.
1.6. Where Do I Get More Help?
Advanced installation help can be found in the RTI Connext DDS Installation Guide, which explains:
Installer command-line options
Controlling the location of the RTI Workspace directory
Additional license management options
Special backup of RTI libraries
How to uninstall Connext
Continue to Publish/Subscribe to start learning about the capabilities and features of Connext.
Additional documentation and user forums can be found on community.rti.com.