Chapter 1 Installing RTI Connext
RTI® Connext® is delivered as static and dynamic libraries with development tools, examples, and documentation that will help you use the libraries.
If you are installing a purchased version of Connext, see 1.1 Installing a Regular Version. If you are evaluating Connext or using it for research purposes, see 1.2 Installing a License-Managed (LM) Version. Note that all LM versions require a license key file to run. All use of both regular and LM versions is subject to RTI's Software License Agreement #4000.
1.1 Installing a Regular Version
Connext distributions are provided in two types of bundles: hosts and targets.
- A host bundle contains non-target-specific files, such as documentation, header files, tools, and infrastructure services executables. The host bundle is provided in a .run, .exe, or .dmg file that will run an installer.
Host bundles are named:
- rti_connext_dds-<version>-<package_type>-host-<host-platform>.<extension>
The <package_type> is usually pro.
Note: The legacy core package type does not include all functionality. Please contact your local RTI sales representative or email sales@rti.com for more information.
The <host_platform> depends on your development platform: x64Linux for Linux® systems, x64Win64 for Windows® systems, or darwin for macOS® systems.
The <extension> is run for Linux systems, exe for Windows systems, or dmg for macOS systems.
- rti_connext_dds-<version>-<package_type>-host-<host-platform>.<extension>
- A target bundle contains libraries and any applications that have target-specific dependencies. A target bundle is an “RTI Package” (*.rtipkg) file that must be installed on top of your host bundle.
Target bundles are named:
- rti_connext_dds-<version>-<package_type>-target-<target_architecture>.rtipkg
The <target_architecture> depends on your target machine (where you will deploy your completed application). These strings are listed in the RTI Connext Core Libraries Platform Notes; examples are x64Win64VS2017 and x64Linux4gcc7.3.0.
Note: You may have more than one target bundle if you are developing for multiple targets.
Note: If you are developing C# applications, you need to download NuGet packages as well. For detailed instructions, see Installing Connext in the RTI Connext Getting Started Guide for C#.
If you are installing a patch release (for example, a 7.1.0.x release), read Chapter 5 Special Backup of RTI Libraries .
There are two ways to install a Connext host bundle:
- using an installer, which will prompt you for information such as where to install, or
- using a script, which allows you to run in "unattended mode" so you will not be prompted for information while it is installing.
Both ways are described below.
Running from a Script (Unattended Mode)
When running in unattended mode, the installer will use default values for its parameters unless you specify them at the command line (see Table 1.1 Command-Line Options when Installing from a Script).
Table 1.1 Command-Line Options when Installing from a Script
|
Parameter |
Values |
Meaning |
Default |
|---|---|---|---|
|
--mode |
win32 gtk xwindows osxqt text [not available on Windows] unattended [all platforms] |
Should the installer display a graphical or a text-based UI? Should the installer ask for user feedback? |
GUI available on your platform |
|
--unattendedmodeui |
none [not available on Windows] minimal [not available on Windows] minimalWithDialogs [required on Windows if using --mode unattended] |
If you chose --mode unattended, how much graphical feedback should the installer display? |
none |
|
--prefix |
directory to install into |
The installation directory the product will be placed into. Note that the installer will always place the product in a directory named rti_connext_dds-7.1.0. |
Platform-dependent Windows Example: |
|
--disable_copy_examples |
true false |
Should the installer disable the copying of examples into rti_workspace during installation (true) or not (false)? |
false |
1.1.1 Installing on a Linux System
In these instructions, we assume your host bundle is named rti_connext_dds-7.1.0-pro-host-x64Linux.run and your target bundle is named rti_connext_dds-pro-target-7.1.0-x64Linux4gcc7.3.0.rtipkg. Your filenames will be different depending on your package type and architecture.
- Download the host and target bundles to a location of your choice; for example, /home/<your user name>/Downloads.
- Install the host bundle. As described above, you can use an installer or a script:
- Using the installer:
- Using a script:
- Install the target bundle(s). There are two ways to do this:
- From RTI Launcher:
- From the command line:
- Read Chapter 3 License Management.
- See 1.3 After Installation.
Run the host bundle installer (the .run file). For example:
/home/<your user name>/Downloads/rti_connext_7.1.0-dds-pro-host-x64Linux.run
Follow the on-screen prompts. You will be asked if you want to use the default installation directory (/home/<your user name>) or specify a different path. We refer to the installation directory as <NDDSHOME>, see Chapter 2 Paths Mentioned in Documentation.
Run from a command prompt:
rti_connext_dds-7.1.0-<package_type>-host-<host_platform>.run
--mode unattended --prefix <installation path>
The --prefix option allows you to specify the installation directory; if you omit this, the installer will install into a default location.
For example (enter on one line):
rti_connext_dds-7.1.0-pro-host-x64Linux.run
--mode unattended --prefix /home/user/rti_connext_dds-7.1.0
Start RTI Launcher (<NDDSHOME>/bin/rtilauncher), select the Configuration tab, and click on Install RTI Packages. Add the location of your target file. Click Install.
Open a command prompt and change to the rti_connext_dds-7.1.0/bin directory. Use <NDDSHOME>/bin/rtipkginstall to install the target bundle. For example (enter on one line):
rtipkginstall
  /home/<your user name>/Downloads/rti_connext_dds-7.1.0-pro-target-x64Linux4gcc7.3.0.rtipkg
1.1.2 Installing on a Windows System
In these instructions, we assume your host bundle is named rti_connext_dds-7.1.0-pro-host-x64Win64.exe and your target bundle is named rti_connext_dds-7.1.0-pro-target-x64Win64VS2017.rtipkg. Your filenames will be different depending on your package type and architecture.
Depending on your version of Windows and where you want to install these files, your user account may or may not require administrator privileges.
- Download the host and target bundles to a location of your choice; for example, C:\Users\<your user name>\Downloads.
- Install the host bundle. As described above, you can use an installer or a script:
- Using the installer:
- Using a script:
- Install the target bundle(s). There are two ways to do this:
- From RTI Launcher:
- From the command line:
- Read Chapter 3 License Management.
- See 1.3 After Installation.
From your file explorer, open (double-click) the host bundle installer (the .exe file).
Follow the on-screen prompts. You will be asked if you want to use the default installation directory (C:\Program Files) or specify a different path.
Run from a command prompt:
rti_connext_dds-<version>-<package_type>-host-<host_platform>.exe
--mode unattended --unattendedmodeui minimalWithDialogs --prefix <installation path>
The --prefix option allows you to specify the installation directory. If you do not specify a prefix, the installer will install into a default location.
For example (enter on one line):
rti_connext_dds-7.1.0-pro-host-x64Win64.exe --mode unattended
--unattendedmodeui minimalWithDialogs --prefix c:\program files\rti_connext_dds-7.1.0
When running in unattended mode on a Windows system, you must specify
--unattendedmodeui minimalWithDialogs or the installation will fail.
Start RTI Launcher (<NDDSHOME>\bin\rtilauncher or from the Windows Start menu), select the Configuration tab, and click on Install RTI Packages. Add the location of your package file. Click Install.
Open a command prompt and change to the rti_connext_dds-7.1.0\bin directory. Use the rtipkginstall batch file to install the target bundle. For example (enter on one line):
rtipkginstall C:\Users\<your user name>\Downloads\rti_connext_dds-7.1.0-pro-target-x64Win64VS2017.rtipkg
1.1.3 Installing on a macOS System
Note: Before installing the host and target bundles on a macOS 11 (Big Sur) or macOS 12 (Mojave) system on an Arm v8 (M1) CPU, Rosetta® 2 must be installed and enabled. Rosetta 2 is an Apple tool for translating third-party software applications; without it, an error message will display when attempting to install Connext. Installation instructions for Rosetta 2 can be found at https://support.apple.com/en-us/HT211861. Rosetta 2 is only required during installation of the host and target bundles. It is not required at runtime.
In these instructions, we assume your host bundle is named rti_connext_dds-7.1.0-pro-host-darwin.dmg and your target bundle is named rti_connext_dds-7.1.0-pro-target-x64Darwin17clang9.0.rtipkg. Your filenames will be different depending on your package type and architecture.
- Download the host and target bundles to a location of your choice; for example, /Users/<your user name>/Downloads.
- Double-click on the host bundle .dmg file. You should see a screen appear.
- Double-click on the icon in the screen to run the installer application.
- Follow the on-screen prompts. You will be asked if you want to use the default installation directory (/Applications/rti_connext_dds-7.1.0) or specify a different path. Note that the installer will always place the product inside a folder named rti_connext_dds-7.1.0. We refer to the installation directory as <NDDSHOME>, see Chapter 2 Paths Mentioned in Documentation.
- Install the target bundle(s). There are two ways to do this:
- From RTI Launcher:
- From the command line:
- Read Chapter 3 License Management.
- See 1.3 After Installation.
Start RTI Launcher (<NDDSHOME>/RTI Launcher), select the Configuration tab, and click on Install RTI Packages. Add the location of your target file. Click Install.
Open a command prompt and change to the rti_connext_dds-7.1.0/bin directory. Use <NDDSHOME>/bin/rtipkginstall to install the target bundle. For example (enter on one line):
rtipkginstall /Users/<your user name>/Downloads/rti_connext_dds-7.1.0-pro-target-x64Darwin17clang9.0.rtipkg
1.2 Installing a License-Managed (LM) Version
In addition to Connext Professional, the LM package includes RTI Real-Time WAN Transport, RTI Cloud Discovery Service, RTI Security Plugins, and OpenSSL® version 3.0.8. (The installer provides a prebuilt version of OpenSSL 3.0.8. If you wish to build your own version of OpenSSL 3.0.8, you can find the source code here: https://www.openssl.org/source/.)
LM distributions usually combine the host and target in a single bundle, named after the target. For example, rti_connext_dds-7.1.0-lm-x64Win64VS2017.exe combines the x64Win64 host with the x64Win64VS2017 target in a single lm bundle. The target architecture depends on your target machine where you will deploy your completed application. These strings are listed in the RTI Connext Core Libraries Platform Notes; examples are x64Win64VS2017 and x64Linux4gcc7.3.0.
Some LM distributions require you to install two bundles:
- A combined host/target bundle (.run, .exe, or .dmg), such as rti_connext_dds-7.1.0-lm-x64Linux4gcc7.3.0.run.
- A separate LM target package (.rtipkg) for the specific target architecture.
For example, suppose your target machine uses Ubuntu 18.04 LTS on an Arm v8 CPU. RTI does not currently provide a combined LM host/target bundle for this architecture. So first you would install an LM bundle for any Linux architecture, then install the LM target package for your Ubuntu 18.04 LTS target on an Arm v8 CPU. The instructions below explain how.
1.2.1 Installing on a Linux System
- Download the LM bundle (for example: rti_connext_dds-7.1.0-lm-x64Linux4gcc7.3.0.run) to a location of your choice; for example, /home/<your user name>/Downloads.
- Run the LM bundle installer (the .run file). For example:
- If your target architecture does not have an Arm CPU, skip this step.
- From RTI Launcher:
- From the command line:
- Read Chapter 3 License Management.
- See 1.3 After Installation.
/home/<your user name>/Downloads/rti_connext_dds-7.1.0-lm-x64Linux4gcc7.3.0.run
Follow the on-screen prompts. You will be asked if you want to use the default installation directory (/home/<your user name>) or specify a different path. We refer to the installation directory as <NDDSHOME>, see Chapter 2 Paths Mentioned in Documentation.
For Linux targets with an Arm CPU, you also need to install an LM target package. This package will have “lm-target-arm” in the filename and the architecture will start with “arm”. You can install it on top of any LM bundle for a Linux architecture. That is, the .run file and the .rtipkg file do not have to use the same Linux architecture string. For example, you can install rti_connext_dds-7.1.0-lm-target-armv8Linux4gcc7.3.0.rtipkg on top of rti_connext_dds-7.1.0-lm-x64Linux4gcc7.3.0.run.
There are two ways to install the LM target package:
Start RTI Launcher (<NDDSHOME>/bin/rtilauncher), select the Configuration tab, and click on Install RTI Packages. Add the location of your target file. Click Install.
Open a command prompt and change to the rti_connext_dds-7.1.0/bin directory. Use <NDDSHOME>/bin/rtipkginstall to install the target bundle. For example (enter on one line):
rtipkginstall
  /home/<your user name>/Downloads/rti_connext_dds-7.1.0-lm-target-armv8Linux4gcc7.3.0.rtipkg
1.2.2 Installing on a Windows System
Depending on your version of Windows and where you want to install these files, your user account may or may not require administrator privileges.
- Download the LM bundle (for example: rti_connext_dds-7.1.0-lm-x64Win64VS2017.exe) to a location of your choice; for example, C:\Users\<your user name>\Downloads.
- Install the LM bundle:
- Read Chapter 3 License Management.
- See 1.3 After Installation.
From your file explorer, open (double-click) the LM bundle installer (the .exe file).
Follow the on-screen prompts. You will be asked if you want to use the default installation directory (C:\Program Files) or specify a different path.
1.2.3 Installing on a macOS System
Note: Before installing an LM bundle on a macOS 11 (Big Sur) system on an Arm v8 CPU, Rosetta® 2 must be installed and enabled. Rosetta 2 is an Apple tool for translating third-party software applications; without it, an error message will display when attempting to install Connext. Installation instructions for Rosetta 2 can be found at https://support.apple.com/en-us/HT211861. Rosetta 2 is only required during installation of the host and target bundles. It is not required at runtime.
- Download the LM bundle (for example: rti_connext_dds-7.1.0-lm-x64Darwin17clang9.0.run) to a location of your choice; for example, /Users/<your user name>/Downloads.
- Double-click on the host bundle .dmg file. You should see a screen appear.
- Double-click on the icon in the screen to run the installer application.
- Follow the on-screen prompts. You will be asked if you want to use the default installation directory (/Applications/rti_connext_dds-7.1.0 or specify a different path. Note that the installer will always place the product inside a folder named rti_connext_dds-7.1.0. We refer to the installation directory as <NDDSHOME>, see Chapter 2 Paths Mentioned in Documentation.
- If your target architecture does not have an Arm CPU, skip this step.
- From RTI Launcher:
- From the command line:
- Read Chapter 3 License Management.
- See 1.3 After Installation.
For macOS targets with an Arm CPU, you also need to install an LM target package. This package will have “lm-target” in the filename and the architecture will start with “arm”. You can install it on top of any LM bundle for a macOS architecture. That is, the .dmg file and the .rtipkg file do not have to use the same macOS architecture string. For example, you can install rti_connext_dds-7.1.0-lm-target-arm64Darwin20clang12.0.rtipkg on top of rti_connext_dds-7.1.0-lm-x64Darwin17clang9.0.dmg.
There are two ways to install the LM target package:
Start RTI Launcher (<NDDSHOME>/RTI Launcher), select the Configuration tab, and click on Install RTI Packages. Add the location of your target file. Click Install.
Open a command prompt and change to the rti_connext_dds-7.1.0/bin directory. Use <NDDSHOME>/bin/rtipkginstall to install the target bundle. For example (enter on one line):rtipkginstall /Users/<your user name>/Downloads/rti_connext_dds-7.1.0-lm-target-arm64Darwin20clang12.0.rtipkg
1.3 After Installation
After installation:
- From Launcher, right-click each icon to access documentation about that component. See the RTI Launcher User's Manual (in <NDDSHOME>/doc/manuals/connext_dds_professional/tools/launcher).
- See the RTI Connext Getting Started Guide (in <NDDSHOME>/doc/manuals/connext_dds_professional/getting_started_guide).
Note: On some Linux operating systems, executing the desktop shortcut for Launcher might report that the application has not been marked as trusted. This is a harmful warning that will prevent you from executing Launcher using the desktop shortcut. To remove this warning, click "Trust and Launch":
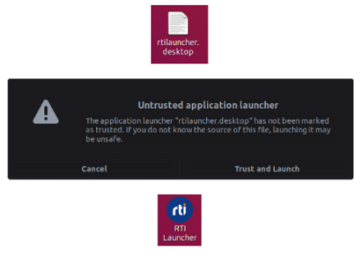
This will mark the desktop shortcut as a trusted application, allowing you to run the application. If the warning doesn't appear and the desktop shortcut still doesn’t run, right-click the shortcut and click "Allow Launching":
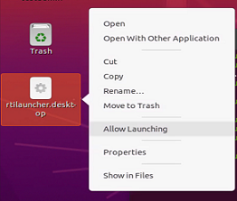
On some Linux operating systems, the desktop shortcut might not execute and will need to be run through the terminal or in the Activities panel. In some newer versions of GNOME, the "Allow Launching" option is missing from the context menu, preventing the desktop shortcut from being run. Launcher can still be run from the Activities panel:

Or you can run Launcher through the terminal by entering the following command:
gtk-launch rtilauncher.desktop