3. Tutorials
This chapter describes several examples, all of which require a Project. You can create your own Project by following Section 2.2.
3.1. Defining Your Data Type
This example shows how to define your own data type using System Designer. In this example, we are going to create the ShapeTypeExtended data type used by the Shapes Demo:
enum ShapeFillKind {
    SOLID_FILL,
    TRANSPARENT_FILL,
    HORIZONTAL_HATCH_FILL,
    VERTICAL_HATCH_FILL
};

struct ShapeType
{
    string<128> color; //@key
    long x;
    long y;
    long shapesize;
};//@Extensibility EXTENSIBLE_EXTENSIBILITY

struct ShapeTypeExtended : ShapeType {
    ShapeFillKind fillKind;
    float angle;
};//@Extensibility EXTENSIBLE_EXTENSIBILITY
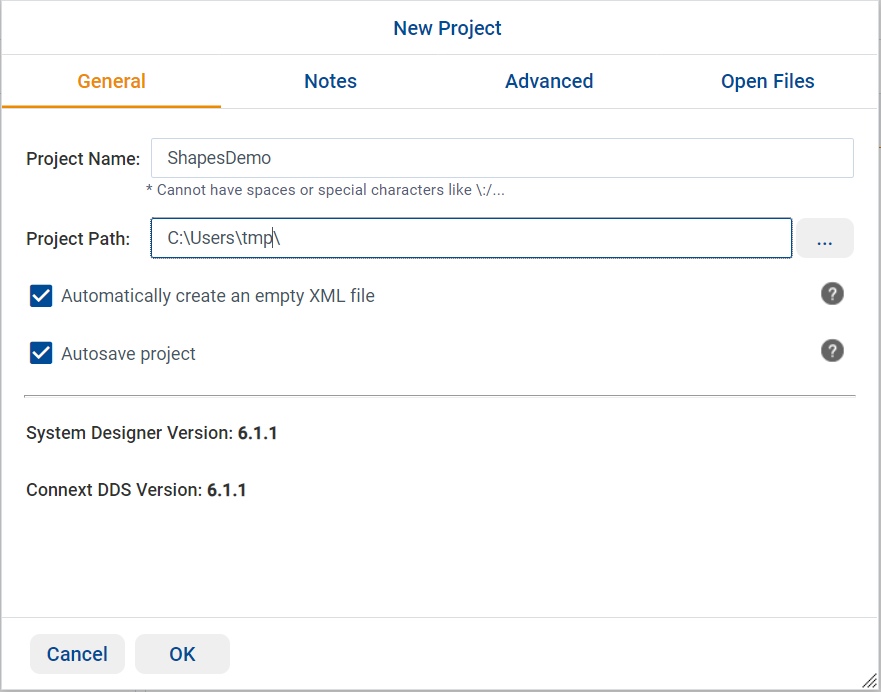
Create a new project (see Section 2.2), name it ShapesDemo, and click OK.
Go to the Types View. By default it should be the first view shown by System Designer.
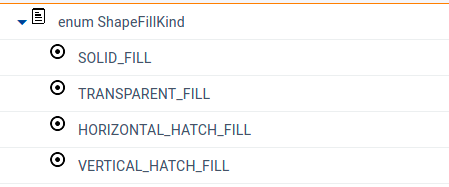
Add an enumeration by right-clicking on Types and selecting Add Enumeration… Name your enumeration ‘ShapeFillKind’ and click OK.
Right-click on the recently created enum and select Add Member… to start adding each one of the following four enumerator value names: SOLID_FILL, TRANSPARENT_FILL, HORIZONTAL_HATCH_FILL, and VERTICAL_HATCH_FILL. You can leave the Value blank and @default_literal unchecked.
Create a struct and name it ‘ShapeType’ by right-clicking on Types and selecting Add Struct… Select APPENDABLE as its @extensibility value and click OK. Fill the struct, adding each member by right-clicking on the struct and selecting Add Member…:
Add a bounded (128) string named ‘color’. This element will be the key of our type, so select the @key checkbox. (You can accept the other defaults in this window.)
Add three longs named ‘x’, ‘y’ and ‘shapesize’. Although ‘long’ is not in the list of suggestions for the Type field, you can type it in. Or use the newer int32 instead of long. See Working with Types.
Create a second struct and name it ‘ShapeTypeExtended’. Choose ShapeType as its base type. Add its elements by right-clicking on the struct and selecting Add Member…:
Add a ShapeFillKind enumerator named ‘fillKind’.
Add a float32 named ‘angle’.
When the type definition is complete, you can download the IDL by clicking on the Download IDL button in the IDL view.
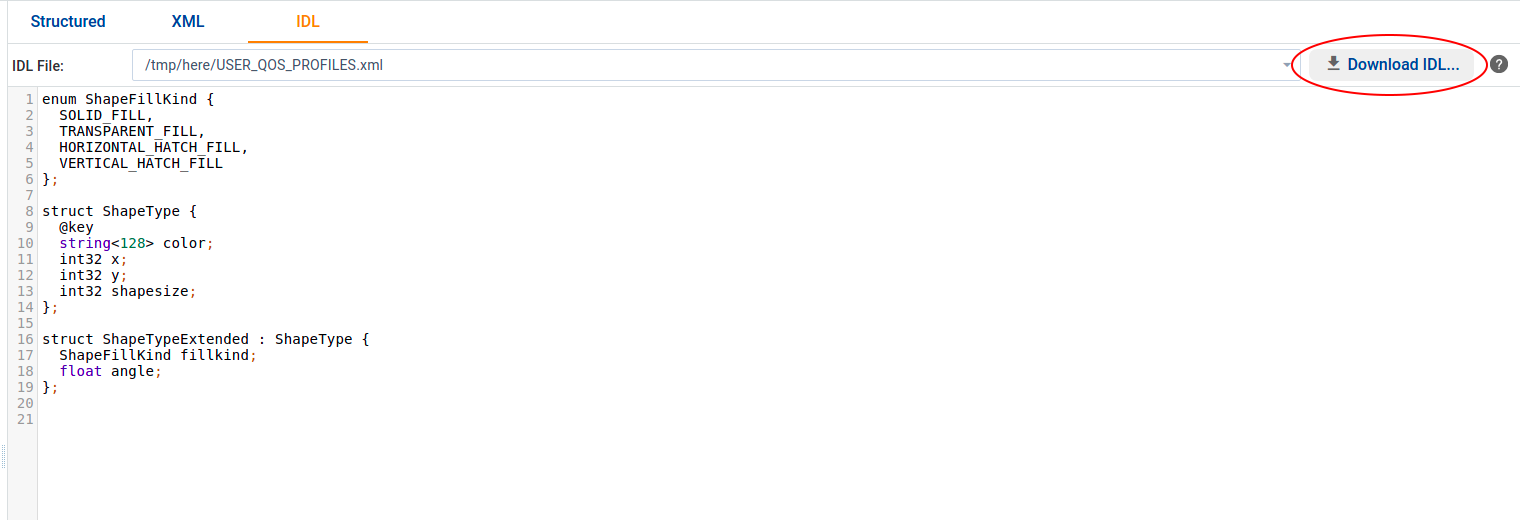
Now you have an IDL file to use to create your own Shapes Demo application.
3.2. Defining an XML Application Creation Configuration File
This example shows how to define an XML configuration file using System Designer. In this example, we are going to create the same configuration file used by the hello_world_xml_dynamic example.
For more information about XML-Based Application Creation, see the RTI Connext DDS Core Libraries XML-Based Application Creation Getting Started Guide.
Create a new XML file inside the open Project by clicking the Files icon at the top and selecting New… You can use the same project as you used in the previous tutorial, or a new project. Name the file USER_QOS_PROFILES.xml. Click OK.
Note
If you see a default XML file already associated with the project, that’s because you kept the default selection, “Automatically create an empty XML file” when you created the project. You can still create USER_QOS_PROFILES.xml, it will not replace the default one.
Go to the Types View. By default it should be the first view shown by System Designer.
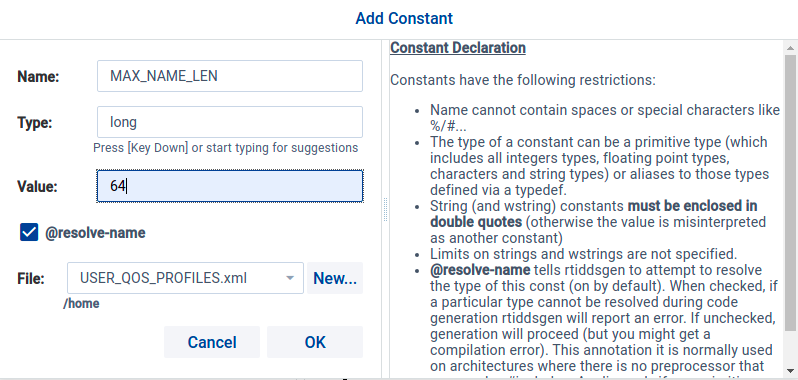
Add two constants (right-click Types > Add Constant…) as follows:
Name ‘MAX_NAME_LEN’, Type ‘long’, value 64, File USER_QOS_PROFILES.xml
Name ‘MAX_MSG_LEN’, Type ‘long’, value 128, File USER_QOS_PROFILES.xml
Create a struct (right-click Types > Add Struct…) and name it ‘HelloWorld.’ Fill the struct by adding each of the following members (right-click on the struct and select Add Member…):
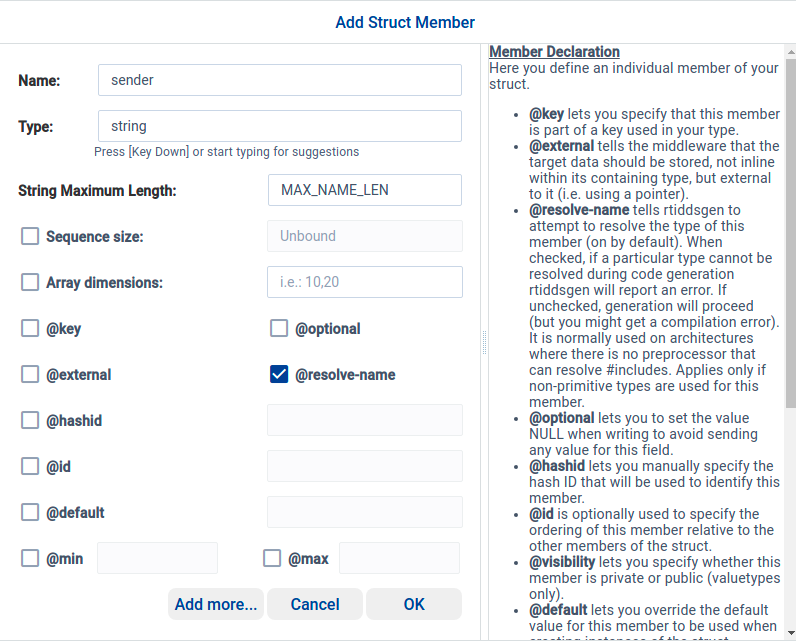
Add a bounded string named ‘sender’ with a maximum length of MAX_NAME_LEN. (For this and the following members, you can accept the defaults in the window.)
Add a second bounded string named ‘message’ with a maximum length of MAX_MSG_LEN.
Add a long named ‘count’.
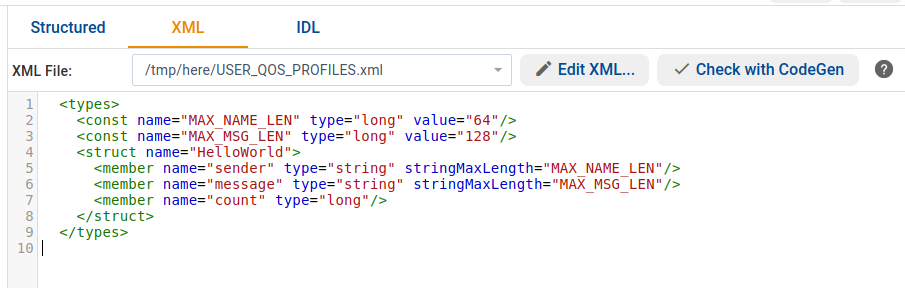
Click the XML view to view how your data type definition looks in XML:
Define the QoS that the application is going to use by clicking on the QoS view. Since we are creating the same XML file as the hello_world_xml_dynamic example has, to match the content of that file you only need to add a new QoS Library named ‘qosLibrary’ and a QoS Profile named ‘DefaultProfile’ inside the created libray. (You do not have to select any of the checkboxes.)
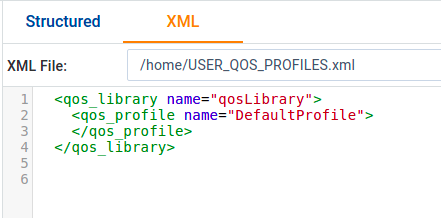
In the XML view, your QoS Profile should look like this:
Now that the QoS has been defined, define the system’s Topic and its corresponding data types, first by defining the Domain:
In the Domain view, right-click on Domain Libraries and select Add Library. Name your domain ‘MyDomainLibrary’ and click OK.
Note
If your project contains more than one XML file, select the USER_QOS_PROFILES.xml file.
Add a domain to your library by right-clicking MyDomainLibrary and selecting Add Domain. Name it ‘HelloWorldDomain,’ entering 0 as its Domain Id.
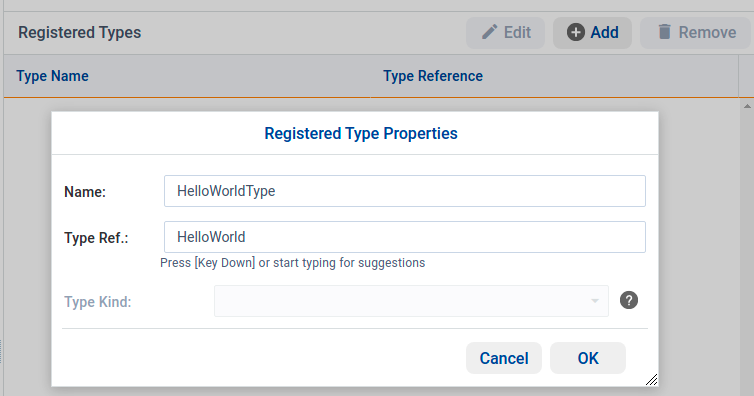
Select HelloWorldDomain and click the Add button to add a registered type. Name the type ‘HelloWorldType,’ selecting the ‘HelloWorld’ struct that we created previously as its type reference.
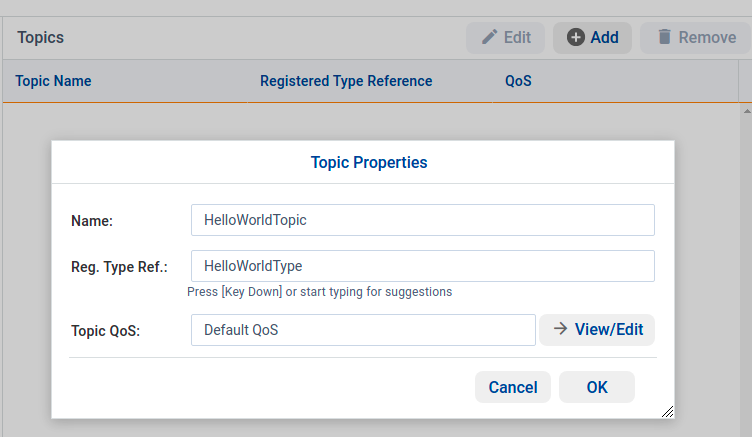
In the Topics panel, click the Add button to add a topic named ‘HelloWorldTopic,’ selecting the ‘HelloWorldType’ registered type as its registered type reference.
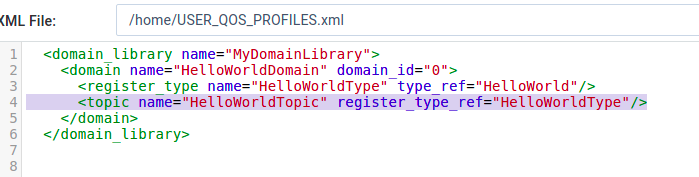
In the XML view, your domain configuration should look like this:
Define the elements that are going to be part of our system by clicking on the Participant view. In this example, we are going to create a simple application containing one DomainParticipant, one Publisher, one Subscriber, one DataReader, and one DataWriter.
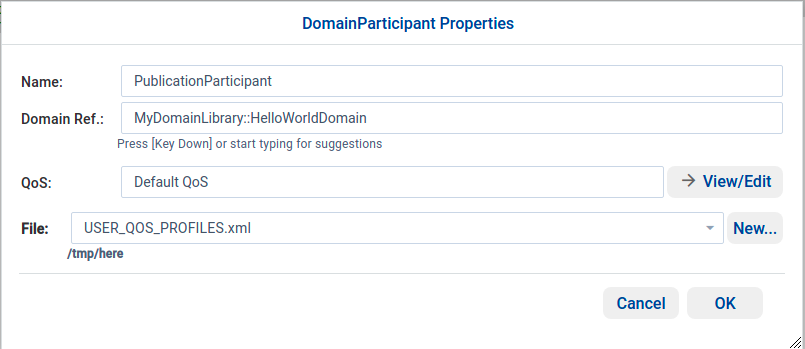
Add a new Participant Library, naming it ‘MyParticipantLibrary.’ Add a Participant inside that library named ‘PublicationParticipant,’ selecting the previously created ‘MyDomainLibrary::HelloWorldDomain’ as its domain reference.
Note
If your project contains more than one XML file, select the USER_QOS_PROFILES.xml file.
Click the Add button to add a publisher named ‘MyPublisher.’
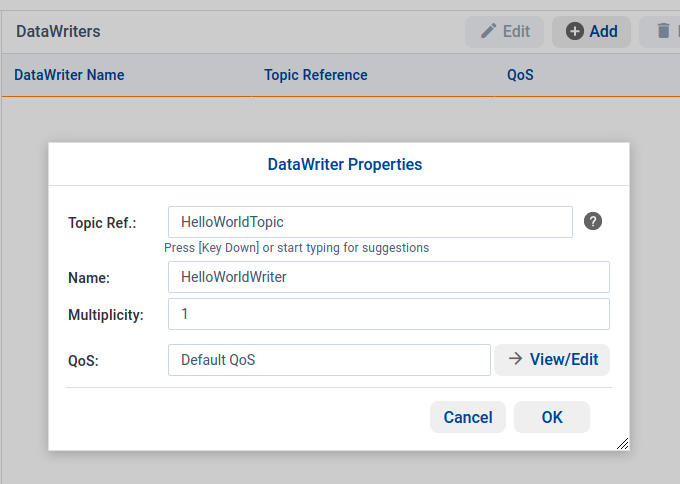
Click the Add button to add a DataWriter named ‘HelloWorldWriter,’ selecting ‘HelloWorldTopic’ as its topic reference.
Add a second Participant inside that library named ‘SubscriptionParticipant,’ selecting the previously created ‘MyDomainLibrary::HelloWorldDomain’ as its domain reference.
Click Subscriptions and add a subscriber named ‘MySubscriber.’
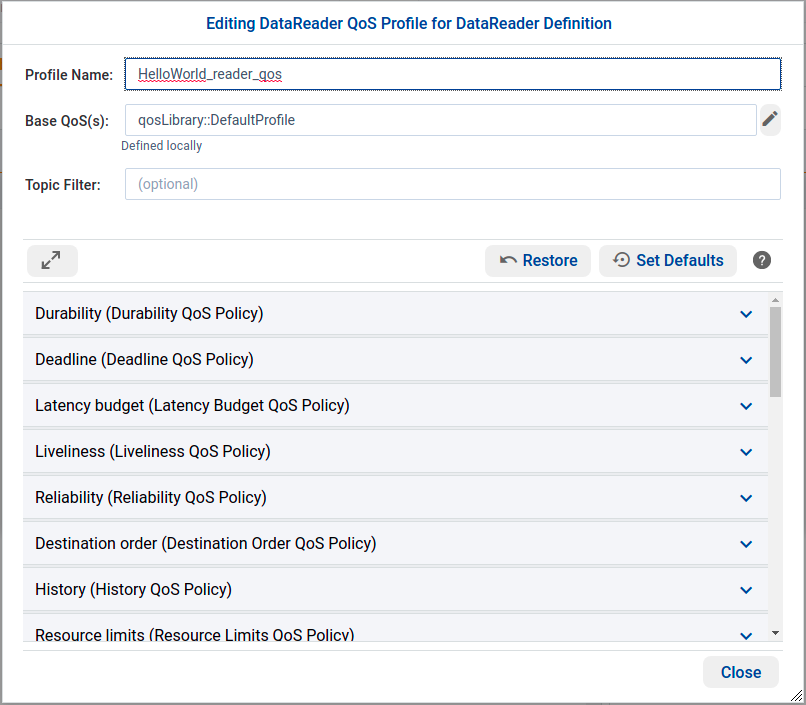
Add a DataReader named ‘HelloWorldReader,’ selecting ‘HelloWorldTopic’ as its topic reference. Unlike for the DataWriter, for the DataReader we are going to select the QoS profile that we created earlier, named DefaultProfile (in the Default QoS): click on View/Edit inside the DataReader dialog and name the QoS Profile ‘HelloWorld_reader_qos’. Select ‘qosLibrary::DefaultProfile’ as its Base QoS.
Your XML view should look like this:
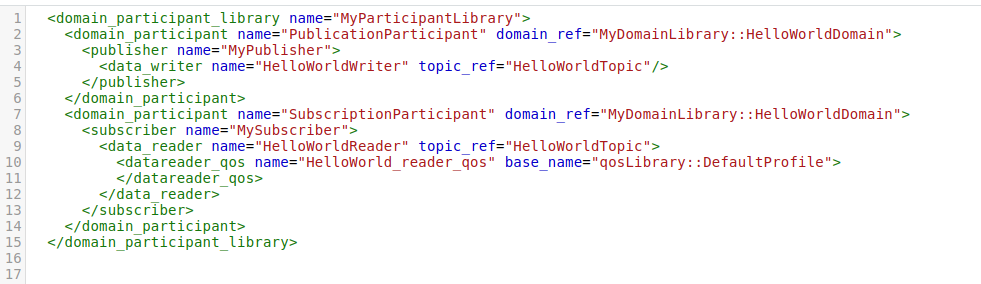
You can use this XML file to define your Connext DDS system using XML-Based Application Creation.