DDS development on Mac OS using XCode 4
The following are step by step instructions to setup XCode to develop DDS applications. The installation of DDS comes with many sample application code in the $NDDSHOME/example folder. We will use the Hello_simple C application as an example, and we will setup the XCode environment to build and run the publisher of Hello_simple.
1. Create a new project, select Command Line Tool project

2. Enter a name for your new project.

3. Add the DDS libraries to the project.
(See RTI_DDS_PlatformNotes.pdf in the doc directory for the appropriate libraries.) In the left panel, click on the root of the project, then click on Build Phases. Under the Link Binary With Libraries tab, click on the "+" icon.

4. Click on Add Others

5. Select the DDS libraries for Mac from your NDDSHome/lib folder

6. The libraries should now show up under "Link Binary with Libraries" as below

7. Add the path to the DDS headers in the include directory
In the Build Settings tab, look for Search Paths -> Header Search Paths. Double click on it, click on the plus symbol, and type in the NDDSHOME/include folder. Be sure to check the "Recursive" box.

8. Verify the path is added properly, as shown below

9. Add the linker flags
(See RTI_DDS_PlatformNotes.pdf in the doc directory for details about the appropriate linker flags.) In the Build Settings tab, look for the "Linking" section, and look for "Other Linker Flags". Add the following: "-ldl -lm -lpthread"

10. Add the appropriate compiler flags
(See the compiler flags in the corresponding make file of the sample application.) In the Build Settings tab, look for "LLVM compiler 2.0 -Language" -> Other C Flags. Add the following: "-DRTI_UNIX -DRTI_DARWIN -DRTI_DARWIN10 -DRTI_64BIT -m64"

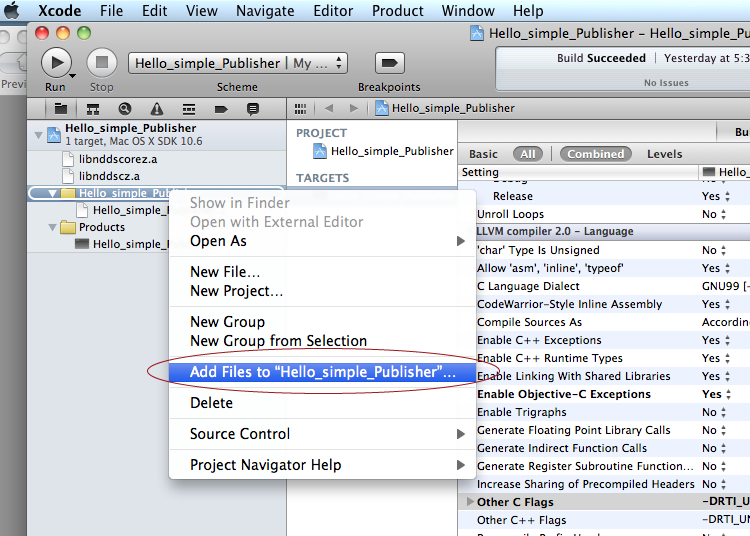
11. Delete the generated code file main.c, and add the DDS publisher sample code in $NDDSHOME/example/C/Hello_simple/src/HelloPublisher.c


12. Build the project. You should see the Build Successful icon

Step 13. Run the project. You can now run and debug the Publisher in XCode

