2.5. Managing Projects
System Designer uses project files (.rtisdproj) to save your application’s
XML configuration files. The Projects menu in the toolbar
provides all operations related to project management.
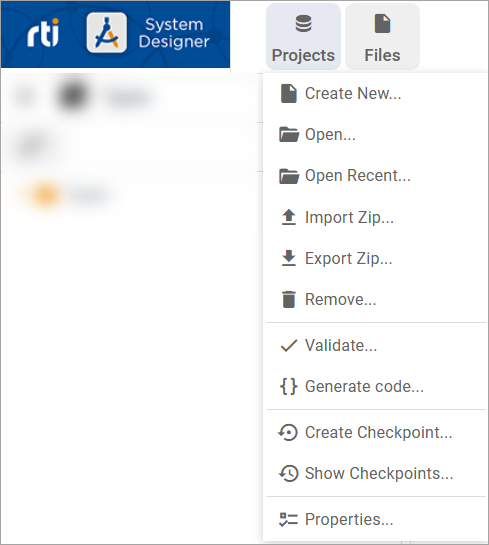
Use the Projects menu to access commands for:
2.5.1. Creating a New Project
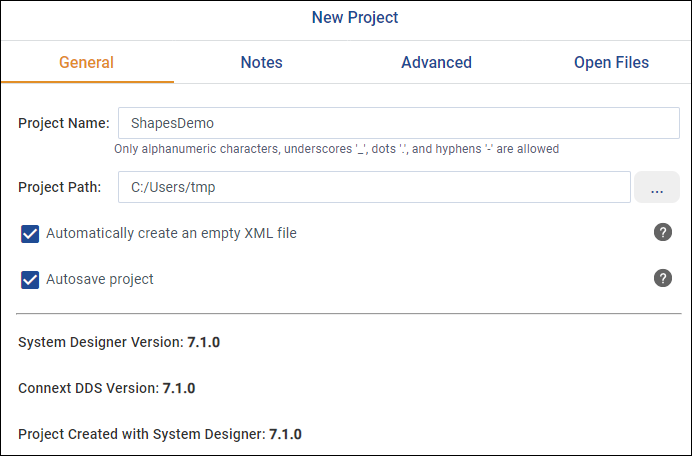
To create a new project after opening System Designer, select Create New… from the Projects menu. For details about completing the New Project dialog, see Creating New Projects.
2.5.2. Opening an Existing Project
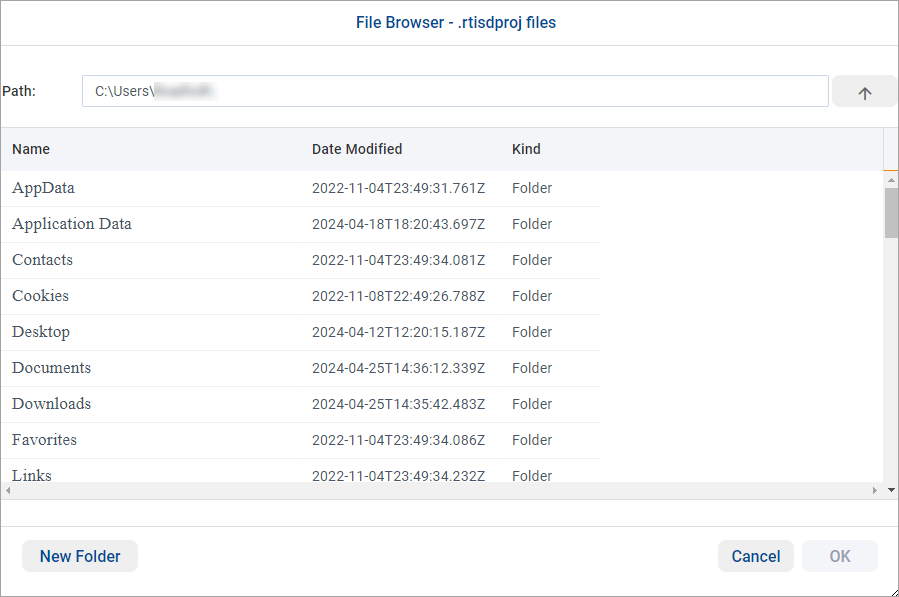
To open an existing project, select the Open… option in the Project menu. In the File Browser – rtisdproj files dialog, browse to and select the project you want to open.
2.5.3. Opening a Recent Project
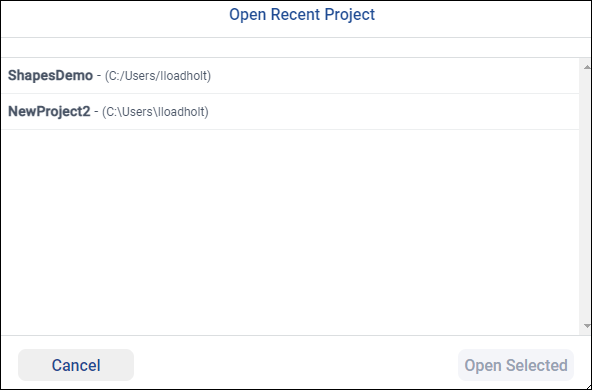
To open a recent project, select Open Recent from the Projects Menu. In the Open Recent Project dialog, select the desired project and click Open Selected.
2.5.4. Importing a Project from ZIP File
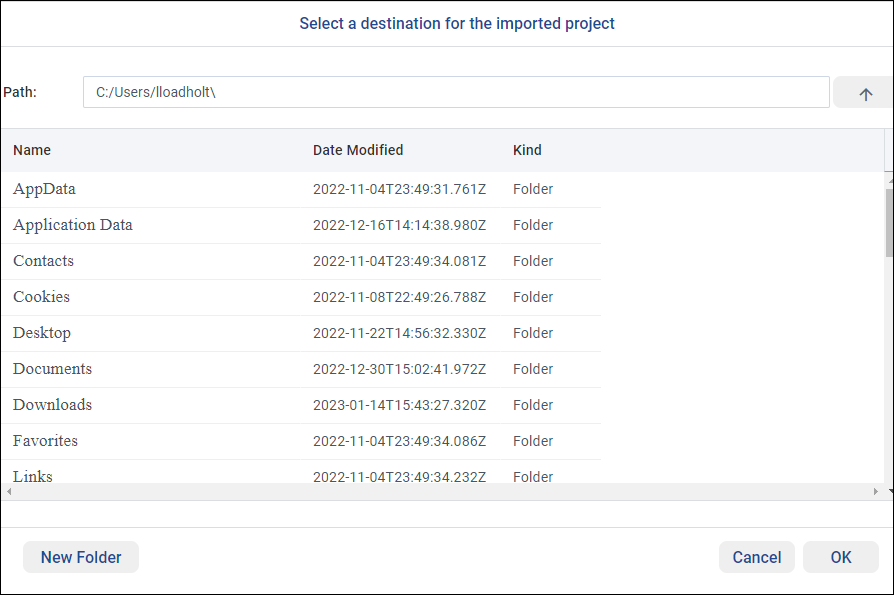
To import a project from a ZIP file, select Import Zip… from the Projects menu, then browse to and select the desired file.
In the Select a destination for the imported project dialog, browse to and select the directory where you want to unzip and store the imported project. Press OK to import and open the project in System Designer.
2.5.5. Exporting a Project to a Zip File
To export the active project to a Zip file, open the project and then select Export Zip… from the Projects menu.
The ZIP file is downloaded in your default download directory. It will contain the project file and all the XML files used in that project.
Note
Some browsers (such as Safari) will automatically unzip the exported file. To maintain and share a Zip file of the exported project, disable this browser behavior or zip the directory again.
2.5.6. Removing a Project from the List of Recent Projects
To remove a project from the list of recently opened projects, select Remove… from the Projects menu. Select the project you want to remove from the list and select Delete:
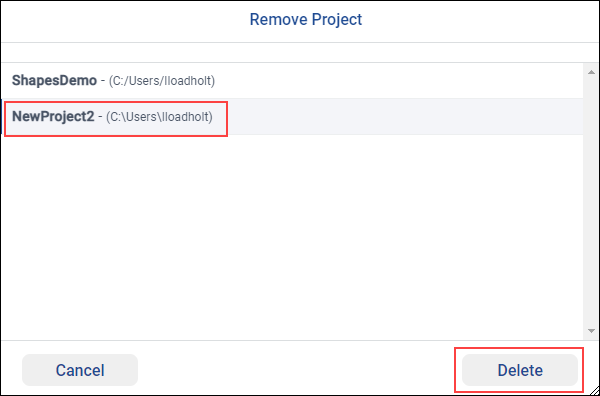
The Remove… command only deletes the project from the list of recent projects in System Designer, not in your filesystem. Use this command to clean up a crowded list of recent projects.
2.5.7. Validating Projects
To validate your XML project files, select Validate… from the Projects menu. In the Validate Current Model dialog, select the Check for unbounded strings/sequences test, then click Run tests. The test results display in the Output area.
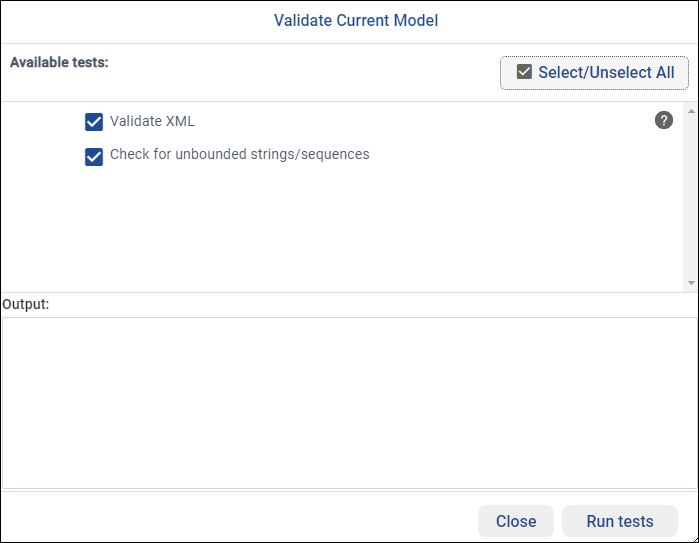
This test checks if any Topics used by DataReaders or DataWriters include data types that use unbounded sequences or strings. If found, a warning displays in the Output area noting the limitations (and potential problems) of using unbounded sequences or strings. In future releases, System Designer will also analyze each Entity’s QoS to ensure the required resources are correctly declared.
2.5.8. Generating Code (Experimental)
System Designer can be considered a frontend for XML-Based Application Creation, a mechanism included in Connext Professional to simplify programming Connext applications. The Generate Code feature builds on that functionality by using it to create application code directly from System Designer.
In this release, code can be generated for a selected DomainParticipant using a predefined template. This template uses XML-Based Application Creation and dynamic data to produce a single publish/subscribe application using the DataReaders and DataWriters defined in the selected DomainParticipant. Code can be created in Python, C, C++11, or C++98. Future releases will include additional templates and languages to expand the available code generation options.
Note
For information about dynamic data, refer to the HTML API Reference; for example, see here for the Modern C++ API.
To generate code, use the Application Generation wizard:
Go to Project > Generate Code, or right-click a participant in the tree panel and select Generate Code in the context menu. The Application Generation wizard opens.
Select the Output directory, enter an Application name, select the code Language, then select the template. The wizard advances to the next screen.
Select the DomainParticipant and the method to use to receive the data.
Click Generate and review the code generation summary to confirm the code has been created and saved.
Optionally, click Open project to launch the generated code in Visual Studio Code (if installed and included in your system search path).
You can click Back at any time to review or make changes in a previous screen.
2.5.9. Creating a Checkpoint (Experimental)
Note
The checkpoint feature is experimental and included in this release for evaluation only. Carefully review and test restored checkpoints before deploying in production.
The checkpoints feature enables you to save a point-in-time snapshot of the open System Designer project. Use it to capture your current system architecture model before making a configuration change. If a subsequent change negatively impacts your project, you can restore a previously created checkpoint.
A checkpoint is automatically created when you create a new project and when an AI-generated configuration suggestion is applied. To request AI suggestions in an open project, click the Ask AI toolbar button, or right-click any element and select the AI command in the context menu.
To manually create a checkpoint:
Go to Project > Create Checkpoint.
In the Save Checkpoint dialog, enter a descriptive comment. Use a description that will help you identify the checkpoint.

Click Submit to save your system configuration as a checkpoint.
Important
Checkpoints are saved in the current browser session. Existing checkpoints are deleted when the browser cache is cleared.
2.5.10. Showing Checkpoints (Experimental)
Note
The checkpoint feature is experimental and included in this release for evaluation only. Carefully review and test restored checkpoints before deploying in production.
After creating one or more checkpoints, you can review the full list of available checkpoints, compare the checkpoint models to the current project, and revert to a selected checkpoint’s model.
To review or restore an existing checkpoint:
Go to Project > Show Checkpoints, or click the Show Checkpoints
 icon in the chat panel.
In the Project Checkpoints dialog, all checkpoints available in the browser cache are listed by date and time created. Review the comments to identify the checkpoint you want to work with.

To compare the current project model to a checkpoint model, select the Compare
 icon in the Actions column.
In the Revert to Checkpoint dialog, the current model and checkpoint model display side by side for easy comparison.

To replace the current model with the selected checkpoint model, select Revert.
All configuration changes applied since creating the selected checkpoint are reversed. Also, a new checkpoint is automatically created to capture your project model as it existed before reverting.

To review the two models without restoring the checkpoint model, select Close.
To delete checkpoints:
Go to Project > Show Checkpoints.
To delete a single checkpoint, click the Delete
 icon.
icon.To remove all listed checkpoints, select Delete All Checkpoints.
Important
Checkpoints are saved in the current browser session. Existing checkpoints are deleted when the browser cache is cleared.
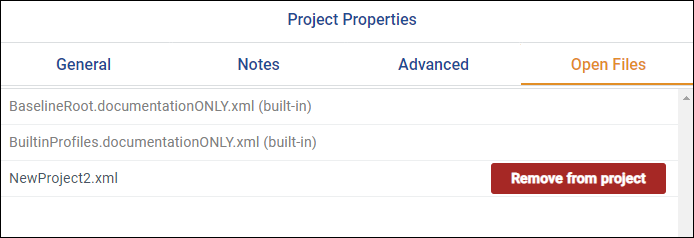
2.5.11. Project Properties
To review and edit the open project’s System Designer properties, select Properties from the Projects menu.
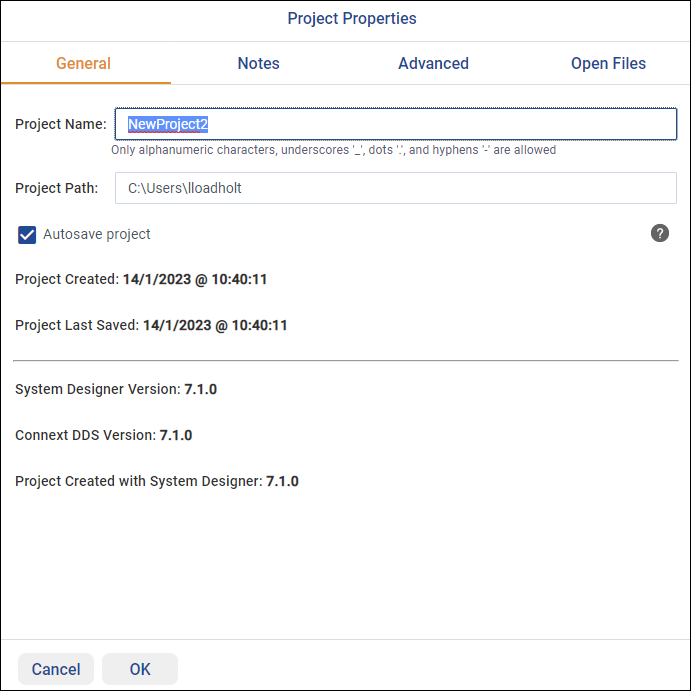
The Project Properties dialog includes four tabs:
General. Displays the active project’s name, path, date created, and last saved date. You can also turn off the option to Autosave projects.
Notes. Enter any notes about the project in the free text field.
Advanced. Select options as needed to fine-tune how your project is presented in System Designer.

Open Files. Displays the project files already in use. It will be empty when creating a new project that does not yet contain any files. To delete any custom project files that you no longer need, select Remove from project.
Where available, use the help icon ![]() for detailed descriptions of each option.
for detailed descriptions of each option.